
Not too long ago I wrote a simple .NET Core WPF application to read references from a .NET assembly and then graph those relationships visually, using the Syncfusion diagram control for WPF. The tool itself is useful, but to be candid, the project was really just a way for me to learn how to work with the Syncfusion diagram control.
Having finished the initial project, I thought I might spend a moment or two covering it here. I have some ideas for future enhancements, that I’ll cover later, when I eventually get around to writing that code. Until then though, let’s walk through what I have, so far.
The tool itself looks like this:
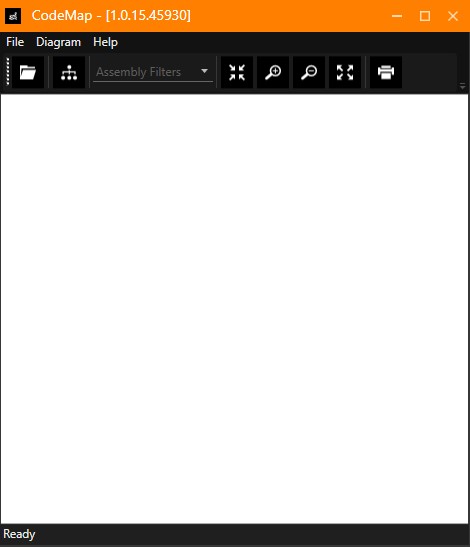
The toolbar contains the following features:
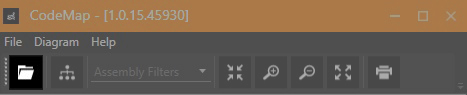
Open a .NET assembly for mapping.
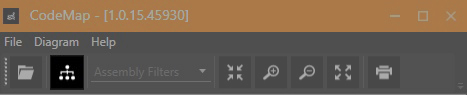
Layout a diagram at any time.

Filter out well known assemblies, to make the resulting map cleaner.
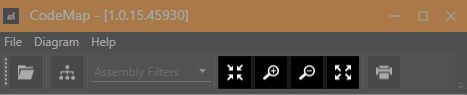
Zoom in, out, restore, or zoom a diagram to page width.
There is also a print icon, on the toolbar, but it’s not yet implemented.
The application uses a simple MVVM architecture, for WPF. The UI is built on top of the Syncfusion controls, for WPF. Syncfusion itself requires us to play by their rules, which is apparent when we look at the code-behind, for the MainWindow.xaml window:
public partial class MainWindow : ChromelessWindow, IUpdateDiagram
{
    public MainWindow()
    {
        SfSkinManager.ApplyStylesOnApplication = true;
        InitializeComponent();
    }

    public void Update()
    {
        diagram.LayoutManager.Layout.UpdateLayout();
    }

    protected override void OnClosed(EventArgs e)
    {
        SfSkinManager.Dispose(this);
        base.OnClosed(e);
    }
}
The class derives from ChromelessWindow, which is Syncfusion’s base class for their UI library. The IUpdateDiagram interface is mine, and is really just a hack to force the diagram to update it’s layout. That code should probably be in the view-model, but, it’s here for now. Yep, my code has a few design warts. It gives me something to improve upon, for version 1.1 :o)
The call to SfSkinManager.ApplyStylesOnApplication, in the constructor is part of how Syncfusion pulls off their skinning features. Otherwise, the only thing left to discuss here is the cleanup of the skin manager, during the OnClosed override.
The XAML for the MainWindow window is too long to display on this blog. It’s all in the project source code, if you really want to view it. For now though, let’s just say that the XAML lays out the design of the main form and wires up a view-model, for the view.
The MainWindow window has an associated view-model class, called MainWindowViewModel. That class is also pretty big, with commands, properties, and methods. So, because of the size of the class, I thought I would point out the interesting parts one-by-one, rather than dumping the entire listing and then trying to explain everything. Here goes …
The MainWindowViewModel class derives from the Syncfusion DiagramViewModel class, like this:
public class MainWindowViewModel : DiagramViewModel
{

}
This is sort of forced on us by Syncfusion, but, the alternative is to build out a bunch of infrastructure for their diagram control on our own. I didn’t fancy that idea.
There are a bunch of commands and properties that the MainWindow window is tied to, via standard WPF binding. I don’t see the value in going over each one of those properties, or the bindings, so, I’ll point out that they are there and then, move on.
The ExecuteFileOpenCommand method is called when the user tries to open an assembly. Here is the listing for that handler:
protected virtual void ExecuteFileOpenCommand(object args)
{
    var owner = args as Window;
    var openFileDialog = new OpenFileDialog();

    openFileDialog.Filter = "Libraries|*.dll|Executables|*.exe|All Files|*.*";
    openFileDialog.DefaultExt = ".dll";
    openFileDialog.Title = "Select a .NET assembly";
    openFileDialog.CheckPathExists = true;

    if (openFileDialog.ShowDialog(owner) == true)
    {
        FilePath = openFileDialog.FileName;
        DiagramDotNetFile(owner);
    }
}
The method prompts the user by creating an instance of OpenFileDialog, which is the WPF wrapper for the standard Windows file open dialog. We setup the properties on the dialog , then we show it on the UI and wait for the user to respond. Assuming the user doesn’t cancel out, we then get the selected file name, from the dialog, and call the DiagramDotNetFile method. That method is where we actually open the assembly and graph the references. We’ll cover that next.
internal protected void DiagramDotNetFile(
    Window owner
    )
{
    try
    {
        IsBusy = true;

        IntitializeViewModel();

        if (File.Exists(_filePath))
        {
            var filters = _filters
                .Where(x => x.Enabled == true)
                .Select(x => x.Filter)
                .ToArray();

            Package.Parse(
                _filePath,
                filters,
                status => SetStatus(status),
                asm => AddNode(asm),
                (parent, child) => AddConnector(parent, child)
            );
        }

        Status = "Updating Layout";
        var ud = owner as IUpdateDiagram;
        ud.Update();
    }
    finally
    {
        Status = "Ready";
        IsBusy = false;
    }
}
DiagramDotNetFile starts by setting a property called IsBusy to true. That property is bound to a Syncfusion spinner control, on the MainWindow window. So, by setting IsBusy to true, we’re essentially causing the UI to display a pretty spinning thingamabob, on the UI. That’s important because, depending on which assembly we open, and what our settings are when we open it, the diagram can either render quickly, or not so quickly. The spinning whatsit on the UI will give users a sense that something is happening while we are busy cranking through the diagram process.
The next thing we do is call the InitializeViewModel method. That method simply sets up a bunch of things that the Syncfusion control needs, to function properly. I’ll show the listing for this method after I finish covering the rest of the DiagramDotNetFile method. For now, just know that we’re setting up the defaults for the Syncfusion diagram control.
The next thing we do, in DiagramDotNetFile, is check to see if the file we’re trying to open actually exists, or not. Assuming it does, we then do some quick LINQ querying to get a list of filters. Those filters are bound to the UI as a dropdown list of assembly names. The user can set a checkbox next to each assembly name, to either enable a filter for that type, or not.
Those filters come in handy for blocking out references we don’t want in our diagrams. For instance, here’s a diagram of my CG.Validations package, with no filters applied:
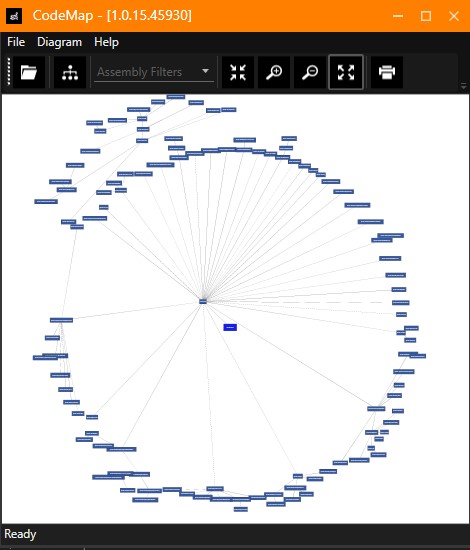
My CG.Validations package is the slightly bigger blue square in the middle. Everything else on the diagram comes from the singular reference to the netstandard package. Filters give us a way to block all that underlying infrastructure out, so we can focus on the references that actually matter to us.
After the filters are ready to use, we then call the Package.Parse method, to actually open the assembly and diagram out the references. The Package class utility is something I wrote to handle the recursive loading logic. I’ll cover the Package.Parse method later. For now, just understand that it opens and parses the references for a .NET assembly, and, for each reference, it calls one or more delegates to direct the Syncfusion diagram to do something with the resulting information.
After we’ve parsed the .NET assembly, and filled the diagram with nodes, we then cast our reference to the main window as an IUpdatedDiagram instance. That cast gives us access to the Update method. If we recall, from when I showed the listing for MainWindow, that Update method simply directs the Syncfusion diagram control to update the layout of the diagram. Essentially, what I’m saying is, after we build the diagram, we then do layout to make the diagram pretty – or, at least, not as ugly.
The last thing we do, in the finally block, is set the value of the IsBusy property back to false again. That causes the Syncfusion spinner control to go away, which shows the Syncfusion diagram that we’ve gone to all the trouble to populate.
I’ve glossed over a few things, in my discussion. For instance, the code that adds nodes to the diagram, and is called via a delegate from the Package.Parse method, is called AddNode, and that code looks like this:
private void AddNode(
    string asmName
    )
{
    Application.Current.Dispatcher.Invoke(
        DispatcherPriority.Background,
        new ThreadStart(() =>
        {
            (Nodes as NodeCollection).Add(
                new NodeViewModel()
                {
                    ID = asmName,
                    Shape = new RectangleGeometry()
                    {
                       Rect = new Rect(0, 0, 1, 1)
                    },
                    ShapeStyle = (Nodes as NodeCollection).Count == 0
                        ? App.Current.Resources["ShapeStyle1"] as Style
                        : App.Current.Resources["ShapeStyle2"] as Style,
                    OffsetX = -200,
                    OffsetY = -200,
                    UnitHeight = (Nodes as NodeCollection).Count == 0 ? 75 : 50,
                    UnitWidth = (Nodes as NodeCollection).Count == 0
                       ? asmName.Length * 10
                       : asmName.Length * 7,
                    Annotations = new ObservableCollection<IAnnotation>()
                    {
                        new AnnotationEditorViewModel()
                        {
                            Content = $"{asmName}"
                        }
                    },
                    Constraints = NodeConstraints.Default &
                      ~(NodeConstraints.Rotatable |
                        NodeConstraints.InheritRotatable)
                });
        }));
}
Let’s walk through this method. The Application.Current.Dispatcher.Invoke part simply allows us to ensure that we’re working on the main UI thread. If you’ve done Windows development before, you know exactly what I mean. If not, just remember that Windows only allows the visible parts of a Windows application to be manipulated on a special thread set aside for that purpose. That thread is the UI thread, and it services everything that’s visible on the screen. So, if we try to update the UI from a background thread, or even (potentially) a Task, we need to take steps to ensure that the update happens on the UI thread. If we don’t do this, Windows becomes quite irate.
The Nodes property is part of what we get, for free. by deriving from the DiagramViewModel class. That property is tied back to the Syncfusion diagram control and it’s how the control knows what nodes are part of the diagram. In our case, we’re adding a node to that property, because the Packages.Parse method has identified another .NET reference for us to diagram.
We add a new NodeViewModel object to the Nodes property, containing the properties we’ll need for nodes in our diagram. NodeViewModel is another Syncfusion class, and again, is part of what we get by using the Syncfusion library.
Another method I wanted to cover, is called AddConnector. That method is also called, via delegate, from the Packages.Parse method. That listing looks like this:
private void AddConnector(
    string parentName,
    string childName
    )
{
    Application.Current.Dispatcher.Invoke(
        DispatcherPriority.Background,
        new ThreadStart(() =>
        {
            var parentNode = (Nodes as NodeCollection).FirstOrDefault(
                x => x.ID.Equals(parentName)
                ) as NodeViewModel;

            var childNode = (Nodes as NodeCollection).FirstOrDefault(
                x => x.ID.Equals(childName)
                ) as NodeViewModel;

            if (null != parentNode && null != childNode)
            {
                (Connectors as ConnectorCollection).Add(
                    new ConnectorViewModel()
                    {
                        SourceNode = parentNode,
                        TargetNode = childNode,
                        Constraints = ConnectorConstraints.Default &
                           ~ConnectorConstraints.Selectable
                    });
            }
        }));
}
This method is similar to what we already saw, with the AddNode method. Again, we use the Application.Current.Dispatcher.Invoke bit to ensure we’re working on the UI thread.
Here we’re interacting with the Nodes property again, this time looking for two NodeViewModel references that will end up becoming the start and end of a connection, on the diagram. Once we have those two references, we create a new ConnectorViewModel instance and add the new object to the Connectors property. ConnectorViewModel is another class that we get, for free, from the Syncfusion library. The result of this operation is that we draw a line from one square, on the diagram, to another.
The only other thing I think I should cover, on the view-model, is the SetStatus method. This is another method called via delegate, from the Package.Parse method. This method sets the status text, on the bottom of the UI. Here is the listing:
private void SetStatus(string status)
{
    if (false == string.IsNullOrEmpty(status))
    {
        Application.Current.Dispatcher.Invoke(
            DispatcherPriority.Background,
            new ThreadStart(() => Status = status)
            );
    }
}
Not much to say here, really. The method also uses Application.Current.Dispatcher.Invoke to ensure the update happens on the UI thread. Otherwise, it just sets the value of the Status property, which is a property on the view-model that is tied back to the UI through WPF binding. The end result is, when we call this method, the new status text appears on the UI.
I promised to cover the InitializeViewModel method. Here is that listing:
private void IntitializeViewModel()
{
    Caption = $"CodeMap - [{typeof(MainWindowViewModel).Assembly.ReadFileVersion()}]";
    Status = "Ready";

    DefaultConnectorType = ConnectorType.Line;

    Nodes = new NodeCollection();
    Connectors = new ConnectorCollection();

    LayoutManager = new LayoutManager()
    {
        Layout = new RadialTreeLayout()
        {
            HorizontalSpacing = 10,
            VerticalSpacing = 55,
            HorizontalAlignment = HorizontalAlignment.Center,
            VerticalAlignment = VerticalAlignment.Center
        },
        RefreshFrequency = RefreshFrequency.ArrangeParsing
    };

    ScrollSettings = new ScrollSettings()
    {
        ScrollLimit = ScrollLimit.Diagram,
    };

    SelectedItems = new SelectorViewModel()
    {
        SelectorConstraints = SelectorConstraints.Default &
           ~SelectorConstraints.QuickCommands,
    };

    PageSettings = new PageSettings()
    {
        PageBackground = new SolidColorBrush(Colors.White),
        PageBorderBrush = new SolidColorBrush(Colors.Transparent),
    };

    Constraints = GraphConstraints.Default & ~GraphConstraints.ContextMenu;

    ItemDeletingCommand = _itemDeletingCommand ??
        (_itemDeletingCommand = new DelegateCommand(
           ExecuteItemDeletingCommand,
           CanExecuteItemDeletingCommand
        ));
}
Here we begin the setup the Syncfusion diagram control by configuring the Nodes and Connectors properties with empty lists. We then set a LayoutManager object, for the LayoutManager property. LayoutManager is responsible for arranging the nodes and connectors, on the diagram, into something that looks reasonable. For our diagram, I am using a RadialTreeLayout object. That means our diagram will look vaguely like the spokes of a wheel.
Next I set the scroll limits, for the diagram. After that I turn off some of the things that normally show up whenever anything is selected, on the diagram. I just don’t need all of those things for my diagram.
Next, I setup some colors for the diagram.
After that I turn off the default context menu, for the diagram. Again, I just don’t need it for my diagram.
Finally, I wire up a command to execute whenever I try to delete something from the diagram. That ItemDeletingCommand command gets wired up the Syncfusion diagram control and is called, by the diagram, whenever I select something and press the delete key. If we go look at the ExecuteItemDeletingCommand method, it looks like this:
protected virtual void ExecuteItemDeletingCommand(object args)
{
    var e = args as ItemDeletingEventArgs;
    if (null != e)
    {
        var nodeViewModel = e.Item as NodeViewModel;

        e.Cancel = MessageBox.Show(
                $"This will delete the '{nodeViewModel.ID}' node and ALL it's children. " +
                Environment.NewLine + Environment.NewLine +
                $"This action is not undoable! " +
                Environment.NewLine + Environment.NewLine +
                "Are you SURE you want to do this?",
                Caption,
                MessageBoxButton.YesNo
            ) != MessageBoxResult.Yes;

        e.DeleteSuccessors = true;
    }
}
As we all see, this handler prompts the user, just to make sure they really wanted to delete the selected node. Assuming they do, it then sets the DeleteSuccessors property, which tells the diagram to recursively delete all children of the selected node. That way, we don’t leave orphaned bits of the diagram hanging around, after a delete operation.
Let’s do a little recap now. I showed everyone what the UI for my code mapping tool looks like. I then covered the basics for the XAML window and it’s associated view-model. Along the way, I promised to show everyone what the Package class utility looks like. I still have that to do.
The Package class utility contains a single public method called Parse. That method is called by the view-model whenever the user wants to open a .NET assembly and diagram out it’s references. The Parse method looks like this:
public static void Parse(
    string filePath,
    string[] filters,
    Action<string> statusAction,
    Action<string> nodeAction,
    Action<string, string> connectorAction
    )
{
    var table = new Dictionary<string, IList<string>>();

    var loader = new AssemblyLoader(
        Path.GetDirectoryName(filePath),
        "CG.Tools.CodeMap",
        false
        );

    if (filters == null)
    {
        filters = new string[0];
    }

    statusAction($"Opening: '{Path.GetFileName(filePath)}'");

    try
    {
        var assembly = loader.LoadFromAssemblyPath(
            filePath
            );

        statusAction($"Parsing: '{Path.GetFileName(filePath)}'");
        GetReferencedAssemblies(
            assembly,
            loader,
            filters,
            statusAction,
            ref table
            );
    }
    catch (Exception ex)
    {
        statusAction(
            $"Error: {ex.Message} while parsing: '{Path.GetFileName(filePath)}'"
            );
        table.Clear();
        return;
    }

    var count = table.Keys.Count;
    var x = 0;
    var nodes = 0;
    foreach (var asmName in table.Keys)
    {
        statusAction($"Adding {x++} of {table.Count} Nodes.");
        nodeAction(asmName);
        nodes++;
    }

    var connectors = 0;
    foreach (var asmName in table.Keys)
    {
        var children = table[asmName];
        count = children.Count;
        x = 0;
        foreach (var childName in children)
        {
            statusAction(
               $"Adding {x++} of {children.Count} Connectors to '{asmName}'."
               );
            connectorAction(asmName, childName);
            connectors++;
        }
    }

    statusAction($"Done! {nodes} nodes added with {connectors} connectors.");
}
The first thing we do, in the Parse method, is create an instance of a class called AssemblyLoader. The AssemblyLoader abstraction is a custom loading context I wrote, that is part of the CG.Runtime NUGET package. That class is beyond the scope of this blog post, so, for now, just know that it will load the .NET assembly we want to parse, and do it in a way that won’t add it to our current AppDomain instance. That feature is important when a user tries to graph references for many different assemblies, and we eventually end up with things like version conflicts and so forth. If we simply loaded each assembly into the AppDomain, we would have to close and restart the application to work around those kinds of version conflicts. Yuck …
After we create the loader, we tell the UI that we are about to open the specified .NET assembly by calling the statusAction delegate.
After that we use the loader to actually load the .NET assembly. Once it is loaded, we tell the UI that we loaded the assembly, then we call the GetReferrencedAssemblies method. I’ll cover the GetReferenceAssemblies method shortly. For now, just know that this method will recursively parse through assemblies, following the references for each one until it runs out of references, and assemblies, to process.
At this point, we have a dictionary of named assemblies and references that have been parsed from whatever .NET assembly the user told us to open and process.
Next, we loop through the keys for that dictionary and call the nodeAction delegate, for each key, to ensure that the diagram contains a node for each one. Recall that, in our case, the nodeAction delegate is actually tied back to our view-model’s AddNode method. That’s how we end up with a node for each assembly.
After that, we loop through the keys again, this time going into another loop for each reference that is associated with a given reference. Inside that inner loop, we call the connectorAction delegate, which, in our case, is actually tied back to our view-model’s AddConnector method. That’s how we end up with at least one connector between every node in the diagram.
Finally, we call the statusAction delegate, which in our case, is wired up to out view-model’s SetStatus method. That’s how we let the UI, and the user, know what’s going on in our Parse method. Of course, we also call that same statusAction method in other places, as well, within the Parse method. I simply didn’t point all of those place out.
For smaller diagrams, or diagrams where many of the references are filtered out, everything will happen quickly enough that the user won’t know the status is updating. For larger diagrams though, where fewer relationships are filtered out, the processing will continue long enough so that the user will appreciate the status updates, from our Parse method.
The GetReferencedAssemblies method is shown here:
private static void GetReferencedAssemblies(
    this Assembly asm,
    AssemblyLoader loader,
    string[] filters,
    Action<string> statusAction,
    ref Dictionary<string, IList<string>> table
    )
{
    var asmName = asm.GetName();

    if (table.Keys.Any(x => x == asmName.Name) ||
        filters.Any(x => x.IsMatch(asmName.Name)))
    {
        return; // Nothing more to do.
    }

    table[asmName.Name] = new List<string>();

    foreach (var reference in asm.GetReferencedAssemblies())
    {
        if (table.Keys.Any(x => x == reference.Name) ||
            filters.Any(x => x.IsMatch(reference.Name)))
        {
            continue; // Nothing more to do.
        }

        table[asmName.Name].Add(reference.Name);

        try
        {
            var asmTemp = loader.LoadFromAssemblyName(
                reference
                );

            GetReferencedAssemblies(
                asmTemp,
                loader,
                filters,
                statusAction,
                ref table
                );
        }
        catch (Exception ex)
        {
            statusAction.Invoke(ex.Message);
        }
    }
}
This method begins by getting the assembly name for the current assembly. When this method is initially called, by the Parse method, that assembly reference will be the one given to us by the caller. However, after that, the assembly will be one of the references of that initial assembly.
Once we have the assembly name we check the filters to see if we should ignore the assembly. If so, we simply exit. If not, we loop through a list of all the references for the assembly. For each reference, we check the filters again, to see if we should ignore that reference. If so, we skip it, if not we continue to process.
If we’ve decided to process a reference we add it to the table of references we are building with this method. After that, we try to load the assembly, using the custom loader we created at the start of the Package.Parse method. That loader object was passed into this method as a parameter.
Assuming we load the referenced assembly, we then process that assembly by calling the same GetReferencedAssemblies method, recursively, using the referenced assembly as an argument. This way, we eventually walk down the tree of references and process each one before we stop.
Well that’s about it. There are certainly other parts to this WPF application, but, most are just boilerplate WPF, and so, not very interesting, to me. Feel free to peruse the code if you are interested in that sort of thing.
As I write this, I have some plans to eventually implement the diagram printing. I also want to add more actual functionality to the app – including, at least, the ability to do some class mapping for types in an assembly. For now though, this is what I have completed.
The tool is good for visualizing the relationships between .NET assemblies. I use it to help me level out the reference between my many, many NUGET packages. It’s helped me minimize the impact of changes by optimizing the references between packages. I want to eventually make this tool do more, but, for now, I’m happy with it.
I hope you enjoyed the blob post. I hope you enjoy the tool. The source code for the tools can be found HERE.
Thanks for reading!
Photo by Timo Wielink on Unsplash